I’ve been through my share of photobook suppliers, but I just hadn’t been able to find that sweet spot between great quality and price. It was either cheap and it showed, or EXTREMELY expensive. I wanted to find a product that could offer with my wedding packages and pass the savings on to my clients.
Did I find the perfect compromise I was looking for?
YES! After what it seemed like an endless Google search, the name Adoramapix kept popping up with excellent reviews on their photobooks. After reading a few of those, I decided to visit their web page and find out what they had to offer. First off, their pages are printed on true archival photo paper, which means that your pictures will look as good as you intended them to look. What I found with the press printed books I had tried in the past was that the colors of my images were rather flat and the contrast was toned down. To counteract that result, I had to do some serious tweaking in Photoshop, to the point that I thought the images were going to look awful when printed but that was just to bring them closer to the original look I had envisioned. Adoramapix even offers color correction with their albums, which was a first for me.
How does the workflow compare to other photobook companies?
While there are some album companies that offer plugins for straight export of your layout from within Apple’s Aperture, those companies offer high-end products at high-end prices. In other words, not exactly what I was looking for. Adoramapix provides a web-based interface to create your book and it even provides some templates that you can use. However, if you want something more customized, you can import your designs and assemble the final product by simply expanding your page/spread onto their blank template. My workflow is very simple and fast; once I’m done with the design of the book in Aperture, I select Print and then Save PDF to Folder as JPEG. After I select the folder where my JPEG (pages) files will reside, the export process begins. Those are the images that I use for the pages of the book after I upload them to an Adoramapix gallery. The cover is done in Photoshop in a 20”x 10” canvas, which is the only element that I’m not able to create in Aperture. A direct to print plugin would be awesome, but the whole process is pretty fast as it is right now.
How does the quality of the product compare to other companies?
Well, let’s just say that I’ve ordered four (4) more books since I got my first sample album just a few weeks ago. The lay-flat, 10”x 10”, 26-page sample album that I got from them lived up to all the hype! Finally my images looked just the way I wanted them to look, as the color reproduction, the contrast and everything else was spot on.
What do the books look like?
What better way to show that with some pictures…
Tuesday, November 22, 2011
Friday, February 25, 2011
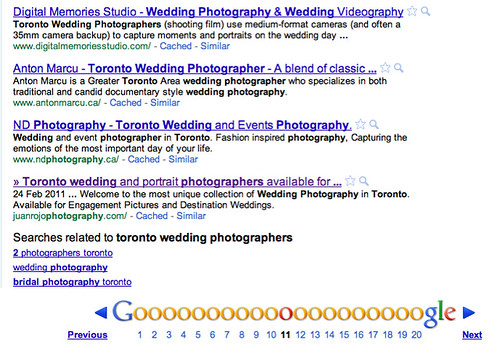
Chasing the Holy Grail of Page Ranking for Toronto Wedding Photographers
Are you a wedding photographer in Toronto? Welcome to the club! It seems there are more of us than there are brides looking for our services. You can chalk it up to the rise of digital photography, newbies misled into thinking wedding photography is easy and extremely profitable (I get a kick out of that one), weekend warriors, etc., etc. There are several reasons for the current saturation of the market but that's material for an entire blog post by itself.
We all have to struggle for visibility so we can get our work seen by the biggest number of potential clients before they move on to the next website.
From late November of last year (2010) until early January of 2011, I had really dropped the ball on my blogging and social media channels, especially Twitter. This translated into my page ranking dropping from 6th page for "Toronto Wedding Photographers" to Page 19, ouch!!! Needless to say I had to get my act together quickly and got blogging right away. I became far more active on Twitter engaging followers and people I follow, instead of posting random quotes and retweeting someone else's content or even worse, spamming people with my latest workshop (again, topic for another blog post). In addition, I started posting ads on Craisglist and Kijiji. I know, that's the last place you want to be found at, but look at it from a different angle. Those two sites generate a tremendous amount of traffic and both of them allow you to incorporate direct links to your website (Craigslist allows actual HTML code in the body of your ad, while Kijiji charges $4 for allowing you to add a link). In other words, you don't have to post bottom feeder offers or anything like that, you can just use the ads to promote your services.
There's more! Even though there are many of us wedding photographers out there, quite a few of us know or at least have heard of other members of our community. Some of us even network with other photographers and develop working relationships with those photographers. Guess what, we can help each other out by commenting on other photographers blogs. I'm not afraid to admit that I follow and admire a lot of other people's work and I'm sure each and every one of us appreciate a flattering comment on the work we do. How does that help, you may ask. Well, it's simple in most of the current blogsite platforms, the fields required for leaving a comment include your e-mail address and a wesbite so once that comment is approved, it eventually becomes and inlink to yours. Having said that, I try not to be a comment-whore (is that even a term?). I just leave comments on blogs of people whose work I truly admire. I couldn't bring myself to leave a comment on crappy work.
Anyway, to recap that whole bunch of babbling above, here are the steps to follow in order to increase your page rank organically:
1. Comments: Be kind and leave comments on other people's blogs whose work you follow and truly admire.
2. Twitter: Use Twitter to engage your followers and also provide useful information, like a link to this blog post for example.
3. Craigslist and Kijiji: Let go of your fears and use these two sites as promotion tools.
4. Blogging: Posting beautiful weddings is all nice and cool but it also helps if you have a secondary blog (which links back to your photography site), where you post actual content, as opposed to just images. Remember, useful content.
Now, has the strategy worked for me? Well, I'm no longer on page 19 but in the last two weeks I've moved to the bottom of page 11.
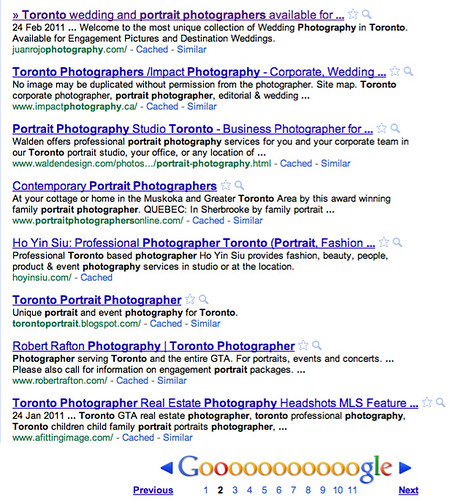
The amazing thing is that in doing so, my rankings for other keywords increased dramatically. Here's my page rank for the keywords "Toronto Portrait Photographer"
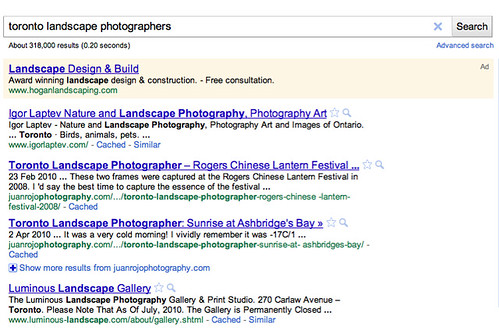
If I were to charge for Landscape Photography commissions, then I'd be pretty happy with myself, as I'm the second listing on page 1 of Google for the keywords "Toronto Landscape Photographer", right above the Luminous Landscape Gallery.
Feel free to leave some feedback on what other kind of information you'd like to see on this blog. Thanks for reading this far.
Thursday, February 24, 2011
How to Find Out Where Your Website Visitors Are Coming From Using Google Analytics
So you've done the social media thing, you spend more time on Twitter and Facebook than you actually should, you try to stay on top of your blogging on a semi-regular basis, you advertise and on top of all that you also have to find time to meet with clients, shoot, edit entire weddings or portrait sessions, you know that actual work-related stuff.
At the end of the day, you are wondering: " Is it all paying off or am I just spinning my wheels?" One easy way to check if your efforts are translating into increased traffic to your website is to use Google Analytics's Custom Reports. If you don't know what Custom Reports are, or worse yet, don't even know what Analytics is then you truly are spinning your wheels.
Watch this video for a quick tutorial on how to create a custom report in Analytics to pinpoint exactly where your visitors are coming from and what pages they are looking at.
Friday, February 18, 2011
Toronto Portrait Photographer: Post Processing or Bringing Images to Life
It's been awhile since the last time I posted here, so I figured a comprehensive post was in order to make up for the last few months I've been absent from this blog. A couple of weeks ago, I had the pleasure of photographing John Shillingberg and Yun He Lee of the Toronto Music Academy of Canada. Like any other portrait photographer out there, most of the time I don't know what to expect in terms of lighting, space and any other variables that make our job so exciting :-)
For this particular shot, the room was big enough to fit two pianos, but the ceiling was fairly low and I just couldn't raise my umbrella high enough to the where I needed it to be. The other challenge was getting enough light to cover both subjects, since I had to place the umbrella out of the frame and even at +2.0 EV this is what I was getting:
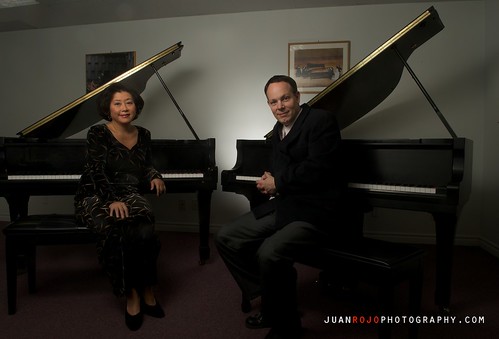
Now, you might say: "That's not so bad!" Well, this is the RAW file after tweaking the shadows in the lower portion of the frame. The setup for this shot was very simple, one (1) SB-900 with a translucent umbrella to camera right, just slightly out of frame and one (1) SB-800 fitted with a 1/4 HONL Speed Grid to create a concentrated spotlight behind the subjects. Now, this is the first version of the file that I presented to the client, a BW conversion using Nik Software's Silver Efex Pro with high contrast to add a bit of drama:
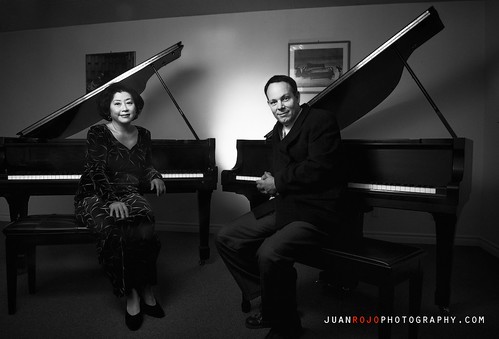
I thought the picture frames behind the subjects added to the composition of the image, but the client felt otherwise and asked me to remove the images. Initially, I thought it was going to be easy but I had completely forgotten that I had used the HONL Speed Grid for this shot, which created different gradations of light throughout the back wall. Needless to say, cloning out the frames (specially the one on the right) was an exercise in patience and precision. For the final image, the client also requested to have the background darkened a bit more. In this case, I think the client was dead on. Once again, I used Nik Software's filters, but this time I applied the Pro Contrast and Midnight filters from the Color Efex Pro 3.0 arsenal to further shape the light to my liking and Viveza 2 to darken the background. Removing the picture frames from the image was done in Photoshop CS 4 using good old cloning.
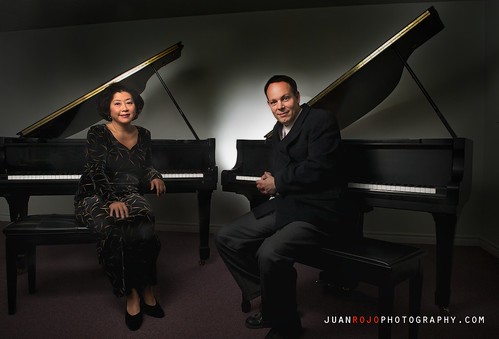
The same lighting setup was applied to the following image:
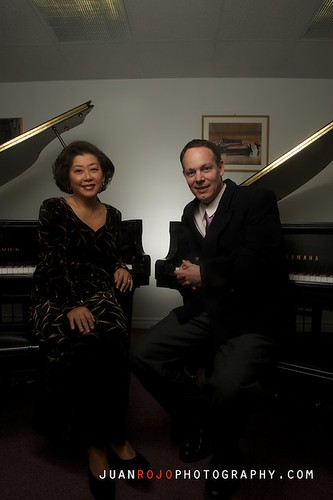
In this case, I boosted the contrast using Color Efex Pro 3.0 Pro Contrast filter and then applied selective lighting using the Midnight filter. The result was the following cropped image:
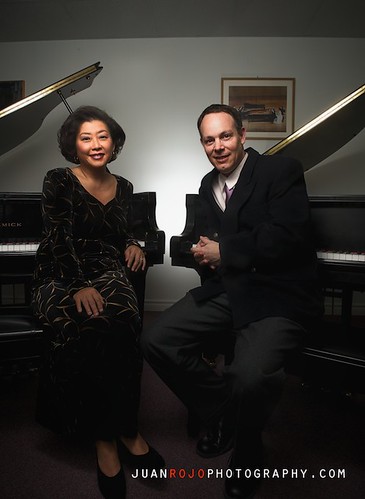
Once again, the client wanted the picture frames removed from the image and the background darkened a bit more, for which I used Viveza 2 and Photoshop CS 4 once more:
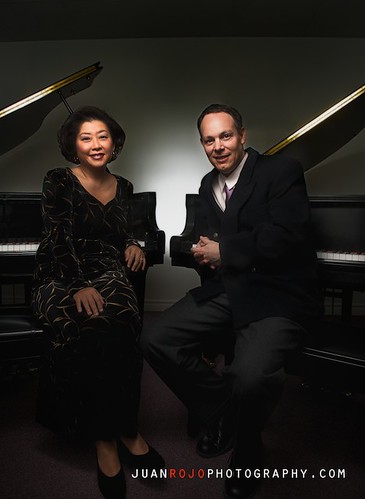
I must say, I'm very pleased with the final results and so was the client. However, as you have seen in this blog post, getting from capture to final image is not always a smooth process and most of the time it takes lots of patience and hard work.
For this particular shot, the room was big enough to fit two pianos, but the ceiling was fairly low and I just couldn't raise my umbrella high enough to the where I needed it to be. The other challenge was getting enough light to cover both subjects, since I had to place the umbrella out of the frame and even at +2.0 EV this is what I was getting:

Now, you might say: "That's not so bad!" Well, this is the RAW file after tweaking the shadows in the lower portion of the frame. The setup for this shot was very simple, one (1) SB-900 with a translucent umbrella to camera right, just slightly out of frame and one (1) SB-800 fitted with a 1/4 HONL Speed Grid to create a concentrated spotlight behind the subjects. Now, this is the first version of the file that I presented to the client, a BW conversion using Nik Software's Silver Efex Pro with high contrast to add a bit of drama:

I thought the picture frames behind the subjects added to the composition of the image, but the client felt otherwise and asked me to remove the images. Initially, I thought it was going to be easy but I had completely forgotten that I had used the HONL Speed Grid for this shot, which created different gradations of light throughout the back wall. Needless to say, cloning out the frames (specially the one on the right) was an exercise in patience and precision. For the final image, the client also requested to have the background darkened a bit more. In this case, I think the client was dead on. Once again, I used Nik Software's filters, but this time I applied the Pro Contrast and Midnight filters from the Color Efex Pro 3.0 arsenal to further shape the light to my liking and Viveza 2 to darken the background. Removing the picture frames from the image was done in Photoshop CS 4 using good old cloning.

The same lighting setup was applied to the following image:

In this case, I boosted the contrast using Color Efex Pro 3.0 Pro Contrast filter and then applied selective lighting using the Midnight filter. The result was the following cropped image:

Once again, the client wanted the picture frames removed from the image and the background darkened a bit more, for which I used Viveza 2 and Photoshop CS 4 once more:

I must say, I'm very pleased with the final results and so was the client. However, as you have seen in this blog post, getting from capture to final image is not always a smooth process and most of the time it takes lots of patience and hard work.
Labels:
Musicians,
Piano,
Toronto Portrait Photographer,
Willowdale
Saturday, August 14, 2010
Toronto Wedding Photographer: Nikon D3s vs Nikon D3 for Low Light Weddings
We've all seen plenty of reviews on noise comparisons between these two cameras, or a Canon 5D MKII vs a D700, etc., etc. However, more often than not, the test results posted are simple shot comparisons of the same image side by side, with the camera set on a tripod. You know what I am talking about, as a working wedding photog, we just want to see these tools working in real life conditions or worst case scenarios. What we are looking for is justification to drop another obscene amount of cash on yet another camera body, right? There's also the much cheaper alternative of renting, which is what I did at Vistek. For $225/weekend, you can have a state of the art D3s body to use as a second camera for the big day.
I thought I was set with my Nikon D3, and that the D3s only made sense as an upgrade if I were to get into video as well. Boy, was I wrong! You can bet I'll be renting that body more often from now on. The following images serve to illustrate the subtle but very key differences between pushing the limits of high ISO with a D3 and doing the same thing with a D3s. First of all, let me explain the case scenario here. The reception for this wedding was very intimate, and it was held at Oro Restaurant. The room where it took place was VERY dark, which was the reason that prompted me to rent the D3s upon finishing my scouting trip to the venue the week before. The couple wanted to keep the lighting mood of the room intact, so bouncing flash all over the walls was out of the question. It was up to Nikon to deliver on its promise of amazing low light performance:
The following shot was taken with the D3s and it shows more or less what the real lighting conditions were there. Bear in mind, I had to set a negative exposure comp to bring the light down to these levels:
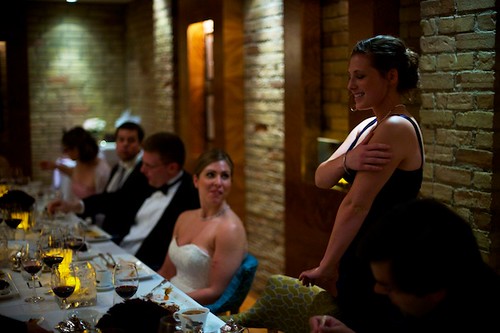
There's noise in the image, but you really can't see it unless you zoom in at 100%, which makes for a very usable image even at these levels.
The D3s really shines in this shot, as the light reflecting on the face of the girl is coming from the small LED candles sitting in front of her. Again, a very usable shot when zoomed in at 100%:
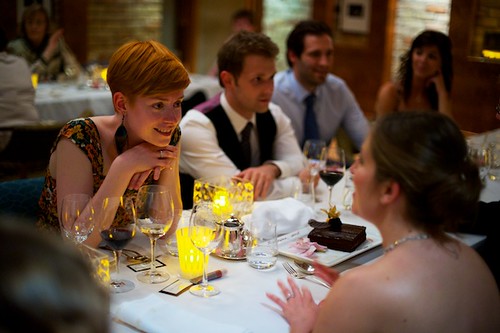
For this shot, I actually had to reduce the Exposure in Aperture in order to bring the light down, as even with the negative exposure comp set on camera, the D3s was essentially seeing more light than my eyes could.
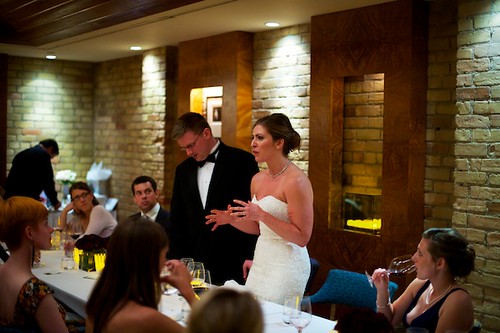
Now, the D3 was a trooper as well and during the reception after reviewing the shots in camera, I thought it had performed on par with the D3s at the same ISO level (6400). Well, the answer is yes and no. The noise level was very similar and I did get plenty of usable shots with my D3 but the subtle differences came later in post processing. At ISO 6400, the D3 images start to present a color degradation. In other words, things like skin tones don't look quite as warm or natural as with the D3s shots. Don't believe me? See for yourself, these shots were processed using the same editing preset in Aperture 3.0. Notice how the skin tones look slightly more pinkish/reddish (depending on the person's skin color).
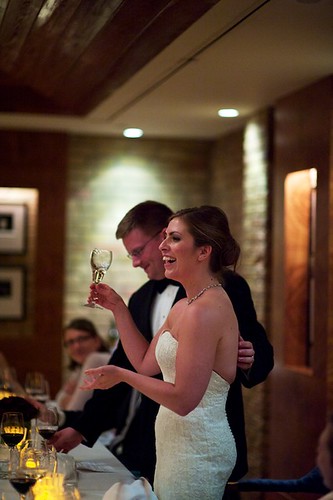
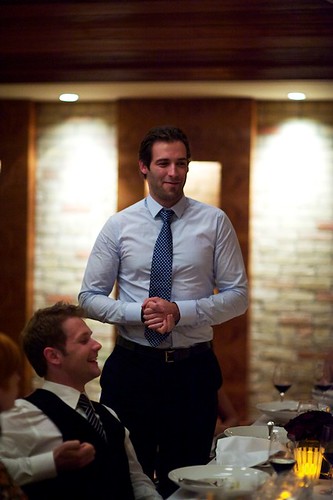
In conclusion, is the D3s superior to the D3 in high ISO performance? The answer is a resounding YES!
I thought I was set with my Nikon D3, and that the D3s only made sense as an upgrade if I were to get into video as well. Boy, was I wrong! You can bet I'll be renting that body more often from now on. The following images serve to illustrate the subtle but very key differences between pushing the limits of high ISO with a D3 and doing the same thing with a D3s. First of all, let me explain the case scenario here. The reception for this wedding was very intimate, and it was held at Oro Restaurant. The room where it took place was VERY dark, which was the reason that prompted me to rent the D3s upon finishing my scouting trip to the venue the week before. The couple wanted to keep the lighting mood of the room intact, so bouncing flash all over the walls was out of the question. It was up to Nikon to deliver on its promise of amazing low light performance:
The following shot was taken with the D3s and it shows more or less what the real lighting conditions were there. Bear in mind, I had to set a negative exposure comp to bring the light down to these levels:

There's noise in the image, but you really can't see it unless you zoom in at 100%, which makes for a very usable image even at these levels.
The D3s really shines in this shot, as the light reflecting on the face of the girl is coming from the small LED candles sitting in front of her. Again, a very usable shot when zoomed in at 100%:

For this shot, I actually had to reduce the Exposure in Aperture in order to bring the light down, as even with the negative exposure comp set on camera, the D3s was essentially seeing more light than my eyes could.

Now, the D3 was a trooper as well and during the reception after reviewing the shots in camera, I thought it had performed on par with the D3s at the same ISO level (6400). Well, the answer is yes and no. The noise level was very similar and I did get plenty of usable shots with my D3 but the subtle differences came later in post processing. At ISO 6400, the D3 images start to present a color degradation. In other words, things like skin tones don't look quite as warm or natural as with the D3s shots. Don't believe me? See for yourself, these shots were processed using the same editing preset in Aperture 3.0. Notice how the skin tones look slightly more pinkish/reddish (depending on the person's skin color).


In conclusion, is the D3s superior to the D3 in high ISO performance? The answer is a resounding YES!
Friday, August 13, 2010
Toronto Wedding and Portrait Photographer: Nikon SB-900 with 1/8 HONL Speed Grid
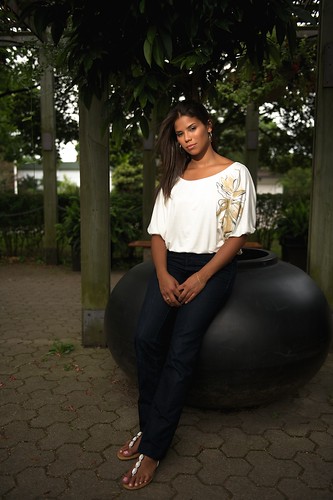
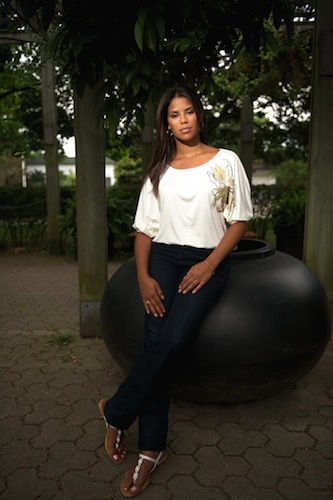
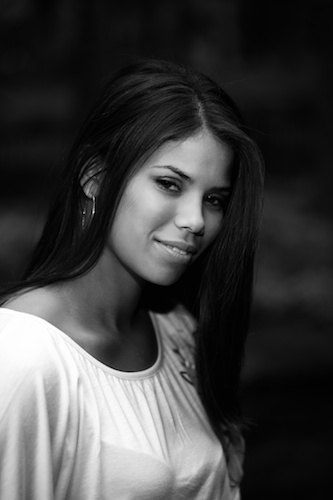
As promised, here are some of the shots taken with the HONL 1/8 Speed Grid, attached to an SB-900. The speed grid serves no other purpose than to concentrate the beam of light to create more dramatic lighting, as opposed to spilling light everywhere. In these photos, the speedlight was aimed at the model's face, the ambient light was reduced and the flash was set to TTL with a flash exposure comp of -0.7. The SB-900 was triggered using an SB-800 on camera.


Labels:
Aperture 3.0,
HONL,
Nikon CLS,
SB-900,
Speed Grids,
Strobist,
Toronto Portrait Photographer
Toronto Portrait Photographer: Alien Bees B1600 with Beauty Dish
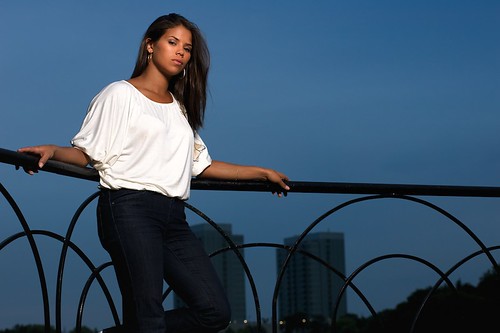
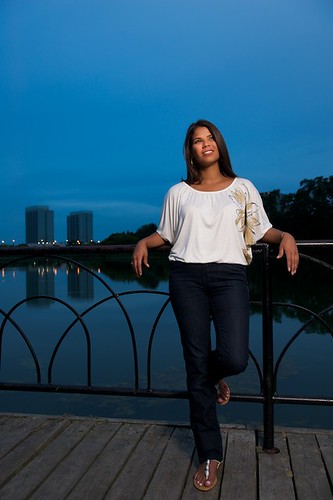
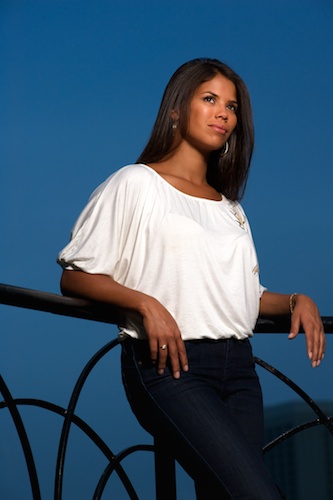
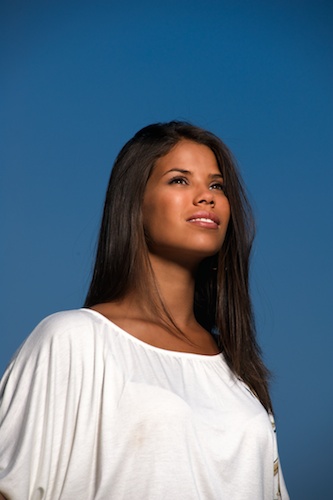
The shots in this post were taken at High Park in Toronto. I was commissioned for a portrait session about a month ago, and decided to follow the old adage: "Better bring it and not need it than need it and not have it" regarding equipment. Bringing a Kata bag with two strobes, a Vagabond II battery and several stands, along with a foldable octabox and beauty dish requires a certain level of fitness to carry around a park, one that I certainly didn't have. I'm so glad I dragged that stuff around through, because the results were quite pleasing. The following shots were done using a B1600 attached to a 22" beauty dish with a difusser sock over it. The strobe was triggered using Pocket Wizards, and the power was set at 1/8 power for most of them. In my next post I'll put some pictures up of the shots that were done using an SB-900 with a HONL speed grid, which are ideal for creating dramatic lighting.


Subscribe to:
Posts (Atom)


